Keep communication open
Whitelisting Extu Emails
Email whitelisting
At Extu, we use emails as the primary way to send you timely information on when to take action such as when to review your campaign and when you to follow up a new lead generated from your campaign.
That’s why it’s important that you mark our email addresses as safe so that you can continue to receive important service-related information.
We’ve put together this guide on what is whitelisting, how to whitelist, and what the Extu emails are that you need to add to your contact list.
What is email whitelisting
Email whitelisting is a way for email providers (such as Outlook) to allocate special privileges to certain trusted senders or domains. Basically, it allows emails from certain sources – like Extu – to be allowed into your inbox.
An email whitelist is a list of approved or ‘safe’ email senders that tells your email client that you know and trust the email address you are getting messages from. More often than not, users have to manually add a domain or a sender’s address to the whitelist within their email client. The process varies between the different email clients.
Benefits of whitelisting
- Email whitelisting leads to improved deliverability
- We ensure you will not miss an email. After all, emails is how we ensure to communicate relevant and timely messages to you.
- We ensure our service emails hit your inbox every time.
Extu emails to whitelist
Service emails
These emails below come from our internal systems and contain important time-sensitive information about your campaign and program. You should add these emails to your contact list to ensure they reach your inbox.
- campaigns@c.extu.com – Campaign drafts & custom content requests
- sales@p.extu.com – Sales reporting reminders
- hello@p.extu.com – General program updates
- leads@f.extu.com – Lead notifications
- notifications@f.extu.com – Form notifications
Third-party domains
Emails from our third-party mailing platform Campaign Monitor also need to be whitelisted to ensure you receive important updates like account invitations and confirmation emails.
Our current sending domains to whitelist are:
- cmail.com, cmail1.com through cmail20.com
- createsend.com, createsend1.com through createsend20.com
See all of Campaign Monitor’s IP addresses here: https://help.campaignmonitor.com/whitelist-campaign-monitors-addresses
Support Inboxes
If you have any campaign questions or changes please email our campaign support team at support@extu.com.
How to whitelist
Whitelisting is a quick, one-time-only task to ensure the sender of an email gets added to the recipient’s address book or safe senders list. The process is different for various email clients. To simplify this task for you, we have outlined whitelisting procedures for a few of the most popular email clients.
To see how to whitelist for different clients, see this guide from Campaign Monitor.
Outlook.com Whitelisting
Whitelisting a domain or specific email address in Outlook.com is just as easy and works by adding the address or domain in question to a group called “safe senders”. An address that has been added to safe senders will be pushed to your inbox regardless of your spam filters. To add an address or domain to safe senders:
-
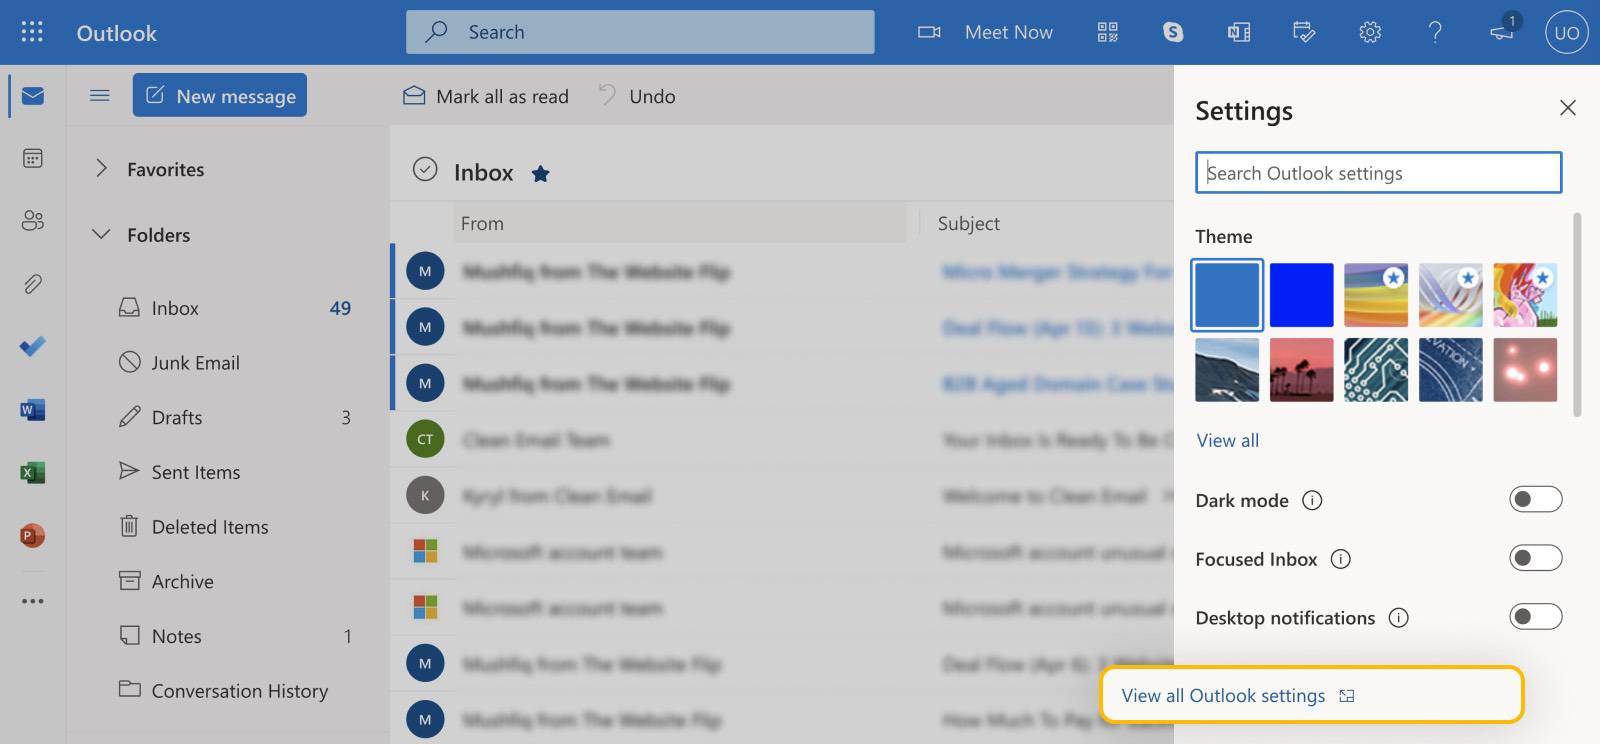
- Click on “Settings”, then “View all Outlook settings”.
- Go to “Junk email”, then choose “Safe senders and domains” or “Safe mailing lists” to select the domain or email you want to whitelist.
- Enter the domain name or email address you wish to add to Safe senders. Make sure to include the @ character for domain names in order to only whitelist emails with the exact string of characters you entered (and nothing more).
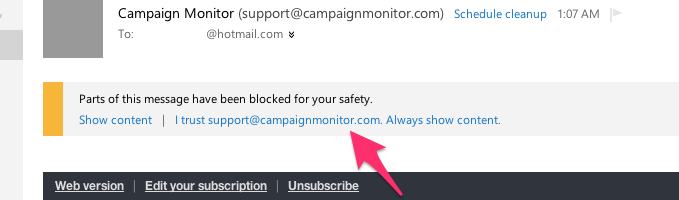
Alternatively, you can simply add an individual email address that has sent you a message to your Outlook Contacts. Though they lead to the same result, this method is quicker and more efficient than manually entering information.
After opening an email message, an alert message should display with, “Parts of this message have been blocked for your safety.” Beneath this, click the link with, “I trust sender@theirdomain.com. Always show content:”
Gmail Whitelisting
Getting all future emails from a sender to appear in the “Primary” tab (instead of “Promotions”, or elsewhere) is a quick process.
- Click the settings button (in the top-right corner of the screen), then select “Settings” from the resulting drop-down menu.
- Navigate to the tab labeled “Filtered and Blocked Addresses” to access information about your existing filters.
- Select “Create a new filter” and enter the emails or domains you want to whitelist. To whitelist a single email address, for example, type the entire address. On the other hand, if you’re trying to whitelist every sender from a certain domain, type the domain alone, such as “@domain.com”. This will tell Gmail to approve every message from that domain.
- Click “Create filter” to approve the new filter, then mark “Never send to Spam” to whitelist every email within the filter. You can also choose to Star these emails, apply a given label, or mark them as important.
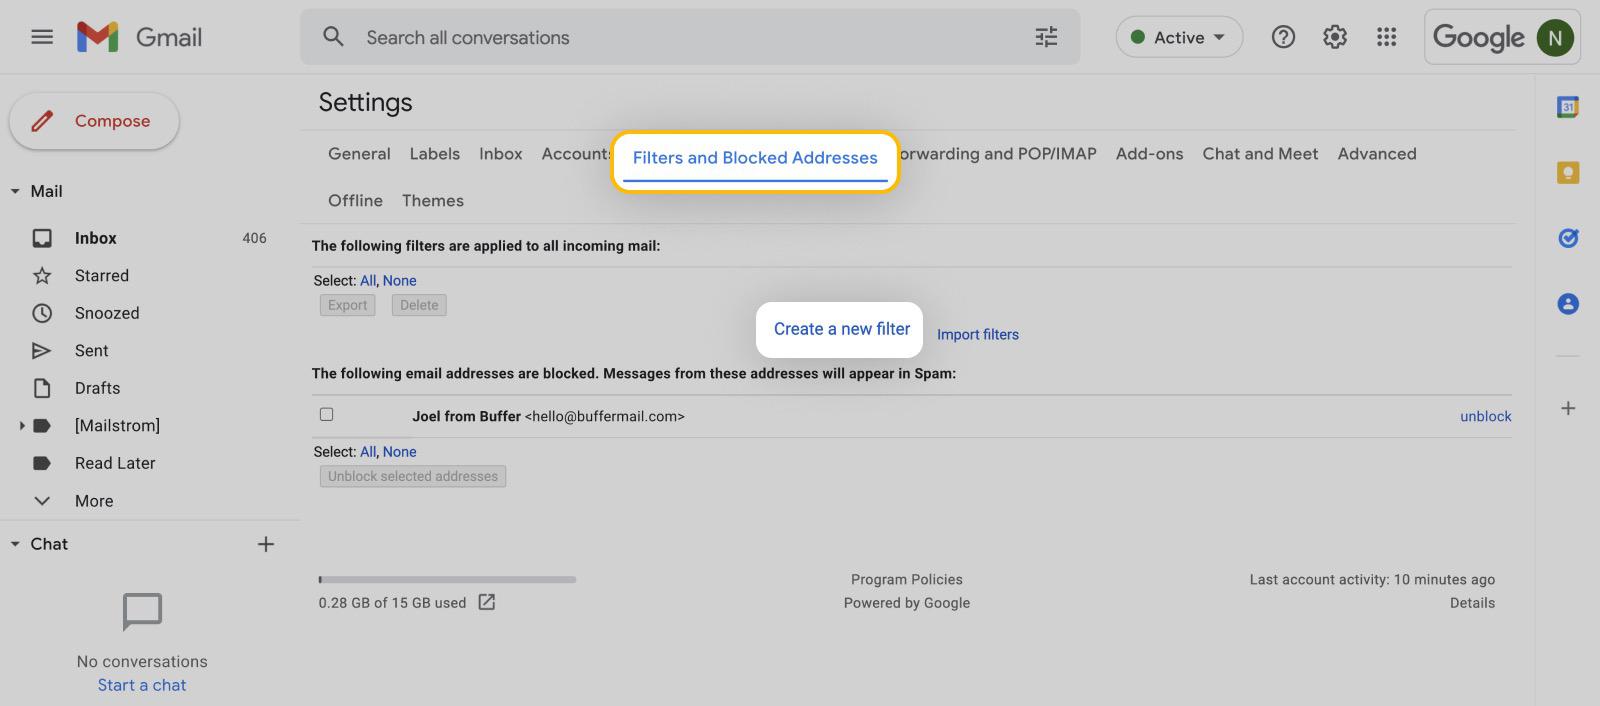
Image Credit: Clean Email
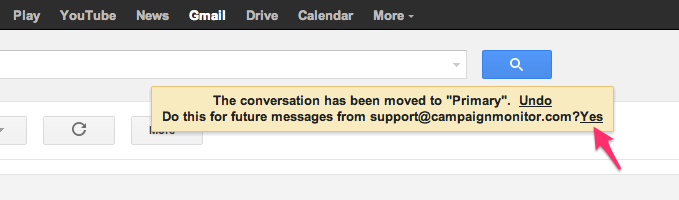
Alternatively, you can simply drag-and-drop the email message from beneath the tab it’s currently filed under, to the “Primary” tab:
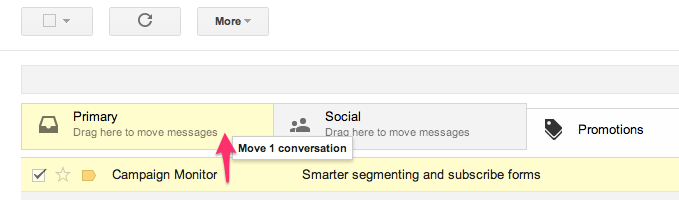
Once done, a message alert will appear with, “This conversation has been moved to Primary. Do this for all future messages from sender@theirdomain.com?” Select “Yes:”